



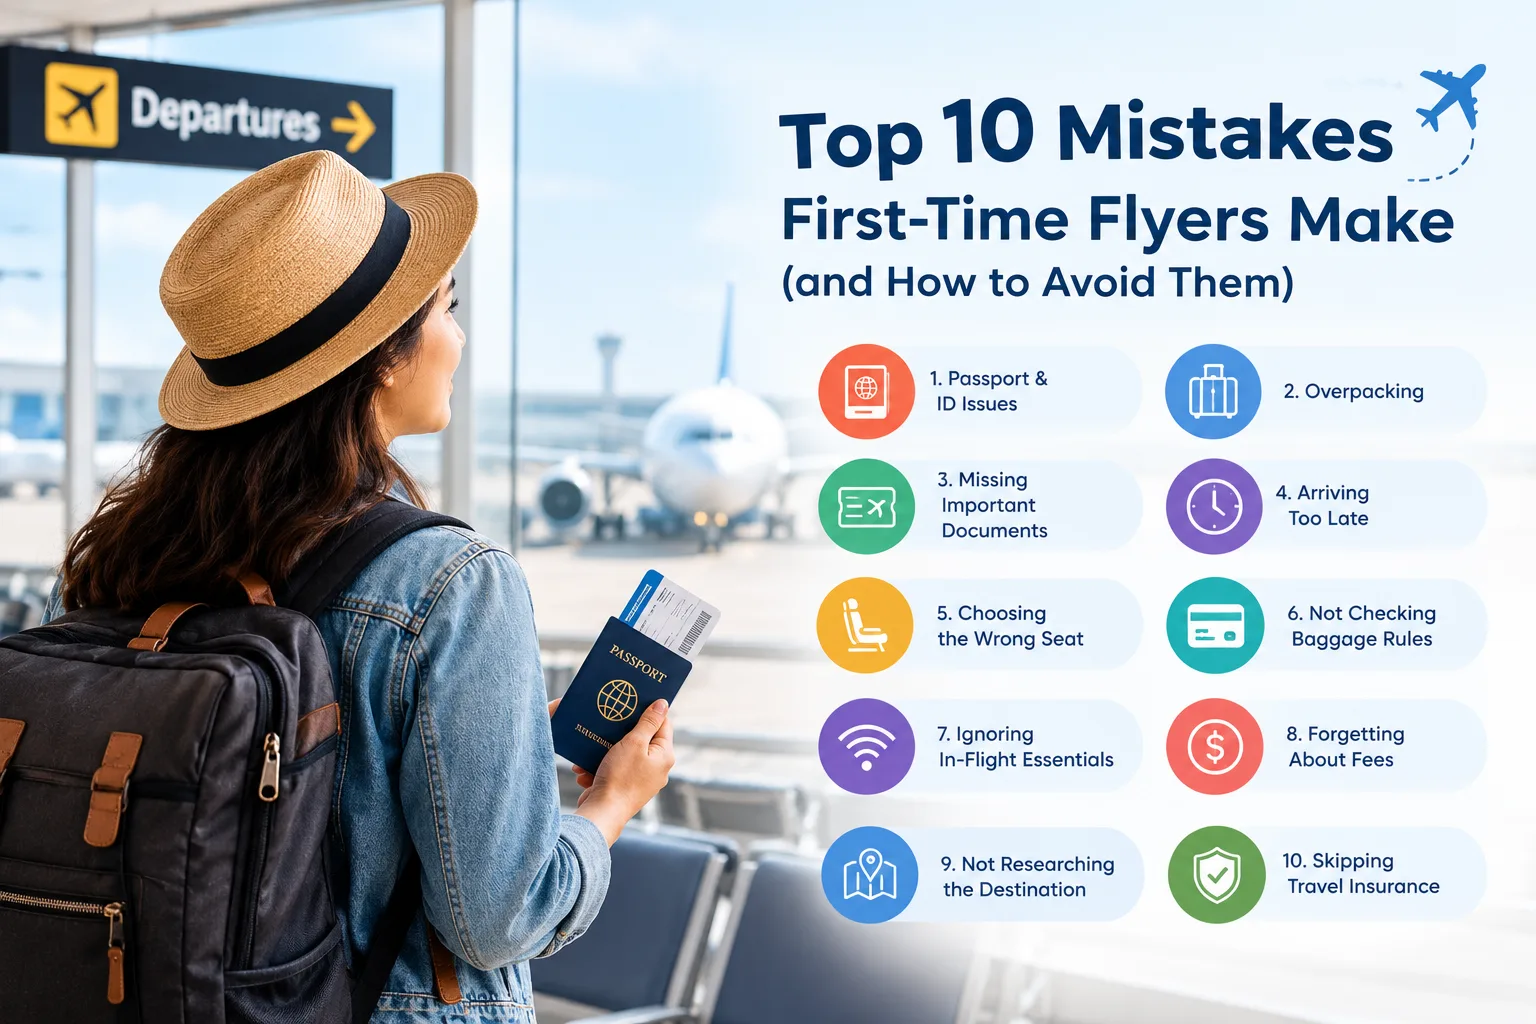
Introduction
Air travel can feel intimidating the first time you do it. Between navigating a sprawling airport terminal, deciphering boarding groups, figuring out what counts as a “personal item,” and trying to remember whether your shoes need to come off at security, it’s easy to feel overwhelmed. Millions of people board a plane for the very first time every year — for a vacation, a new job, a family visit, or a once-in-a-lifetime trip — and almost all of them make at least one avoidable mistake along the way.
The good news is that nearly every first-flight blunder is predictable, and predictable problems can be prevented. Airlines and airports are complex systems with their own quirks, rules, and unwritten etiquette, but once you understand the common pitfalls, flying becomes far less stressful.
This guide breaks down the ten most common mistakes first-time flyers make — from the moment they book a ticket to the moment they land — and gives you clear, actionable steps to avoid each one. Whether you’re flying domestically for a weekend trip or boarding a long-haul international flight for the first time, this article will help you walk into the airport with confidence instead of anxiety.
Quick Reference: The 10 Mistakes at a Glance
| # | Mistake | Why It Hurts You | Quick Fix |
| 1 | Arriving too late (or too early) | Missed flights or wasted hours | Arrive 2 hrs domestic / 3 hrs international |
| 2 | Not checking baggage rules | Surprise fees at the gate ($30–$200+) | Check the airline’s exact size/weight limits before packing |
| 3 | Ignoring TSA carry-on rules | Confiscated items, security delays | Review the 3-1-1 liquids rule and prohibited items list |
| 4 | Booking without checking layover times | Missed connections | Allow 60–90+ minutes for domestic, 2+ hours for international connections |
| 5 | Not checking passport/ID validity | Denied boarding | Verify expiration dates months in advance |
| 6 | Overpacking carry-ons | Gate-checked bags, delays | Follow the airline’s carry-on size chart exactly |
| 7 | Not selecting seats or checking in early | Middle seats, no overhead space | Check in as early as the airline allows |
| 8 | Misunderstanding boarding groups | Confusion, wasted time | Learn your airline’s boarding structure in advance |
| 9 | Not dressing appropriately for the flight | Discomfort, temperature issues | Dress in breathable layers |
| 10 | Skipping travel insurance or trip protection | Financial loss if something goes wrong | Compare basic vs. comprehensive coverage before booking |
Mistake 1: Arriving at the Airport Too Late (or Wastefully Too Early)
The Problem
First-time flyers tend to fall into one of two camps: those who cut it dangerously close to boarding time, and those who arrive so early they spend four unnecessary hours sitting at their gate. Both extremes create problems — one risks a missed flight, and the other wastes valuable time that could be spent elsewhere.
Many new travelers underestimate how long it actually takes to get from the airport entrance to the gate. They picture a straightforward walk from the front door to the plane, forgetting about check-in lines, security screening, long terminal walks, and potential delays at any of these steps.
Real Numbers
According to data from the U.S. Transportation Security Administration (TSA), average security wait times at major hub airports like Atlanta (ATL), Los Angeles (LAX), and Chicago O’Hare (ORD) can range from 15 minutes during off-peak hours to over 45 minutes during peak travel periods like early mornings, Sundays, and holiday weeks. Add in a 10–20 minute walk to a far-flung gate, and a traveler who arrives 60 minutes before departure may already be cutting it close.
How to Avoid It
- Domestic flights: Arrive at least 2 hours before departure.
- International flights: Arrive 3 hours before departure, since these flights often require additional document checks, customs pre-clearance, or longer check-in lines.
- Holiday travel (Thanksgiving week, December 20–January 2, spring break): Add an extra 30–45 minutes to the above windows.
- Check TSA wait times in real time using the MyTSA app or your airport’s website, many of which post live security line estimates.
- Don’t arrive more than 3–4 hours early for a domestic flight — most airport lounges and amenities require paid access, and sitting at an empty gate for hours isn’t an efficient use of time. Instead, arrive early enough to comfortably clear security, grab a meal, and still have a buffer, without wasting half your day.
Pro Tip
If your airline offers online check-in (most do, starting 24 hours before departure), complete it the night before. This shaves several minutes off your airport arrival process, since you won’t need to visit a check-in counter unless you’re checking a bag.
Mistake 2: Not Understanding Baggage Rules and Fees
The Problem
Baggage fees are one of the most common — and most frustrating — surprises for first-time flyers. Many new travelers assume that checked bags are included in every ticket price, or that their carry-on will automatically fit the size requirements. Neither assumption is safe anymore, especially with the rise of budget carriers and “basic economy” fare classes.
Real Numbers
Baggage fee structures vary dramatically by airline and fare class:
| Airline | Basic Economy Carry-On | First Checked Bag | Second Checked Bag |
| Major U.S. Legacy Carriers (standard economy) | Included | $30–$40 | $45–$50 |
| Major U.S. Legacy Carriers (basic economy) | Personal item only on some routes | $35–$40 | $45–$50 |
| Ultra-low-cost carriers | Often charged separately, $25–$65 | $30–$75 | $40–$85 |
| International full-service carriers | Included | Often included in fare | Fees vary by route |
Fees also increase if you pay at the airport rather than in advance — some ultra-low-cost carriers charge double or more for bags added at the gate versus booked online ahead of time.
How to Avoid It
- Read the fare rules before booking, not after. The cheapest ticket price isn’t always the cheapest total cost once baggage fees are added.
- Weigh and measure your bags at home. Most airlines allow checked bags up to 50 lbs (23 kg); overweight bags can cost an additional $50–$100.
- Pre-pay for checked bags online rather than at the airport, which is almost always cheaper.
- Use a luggage scale (inexpensive and widely available) to avoid last-minute repacking at the counter.
- Know your airline’s carry-on dimensions, typically around 22 x 14 x 9 inches (56 x 36 x 23 cm) for U.S. carriers, though this varies.
Pro Tip
If you’re flying a budget airline for the first time, assume nothing is included except your seat and a small personal item. Read the full fare comparison chart on the airline’s website before you book — what looks like the cheapest fare can end up costing more than a full-service competitor once bags, seats, and snacks are added.
Mistake 3: Ignoring TSA and Security Screening Rules
The Problem
Security screening is where many first-time flyers hit their first real snag. Common issues include packing prohibited items, forgetting to separate liquids, wearing complicated footwear or accessories, and not knowing what needs to come out of carry-on bags before screening.
The 3-1-1 Liquids Rule
The TSA’s 3-1-1 rule for carry-on liquids is simple once you know it:
- 3.4 ounces (100 milliliters) or less per container
- 1 quart-sized clear, resealable bag
- 1 bag per passenger
Anything larger must go in a checked bag. This applies to liquids, gels, aerosols, creams, and pastes — including toothpaste, sunscreen, and that travel-size shampoo bottle you forgot was over the limit.
Commonly Confiscated Items
First-time flyers are frequently surprised to learn these items are prohibited in carry-on luggage:
- Full-size toiletries over 3.4 oz
- Pocket knives and multi-tools (even small ones)
- Certain sporting goods (bats, hockey sticks, full-size gear)
- Tools longer than 7 inches
- Snow globes larger than a tennis ball (yes, really — the liquid inside counts)
- Large aerosol cans
How to Avoid It
- Pack a dedicated 1-quart liquids bag and place it in an easily accessible part of your carry-on.
- Check the TSA “What Can I Bring?” tool before packing if you’re unsure about a specific item.
- Wear slip-on shoes when possible to speed through screening.
- Remove laptops and large electronics and place them in a separate bin unless you have TSA PreCheck.
- Avoid wearing excessive metal jewelry or belts with large buckles, which can trigger additional screening.
- Consider TSA PreCheck or Global Entry if you fly more than once or twice a year — PreCheck allows you to keep shoes, belts, and light jackets on, and keep laptops and liquids in your bag.
Pro Tip
If you’re unsure whether an item is allowed, check it in your luggage rather than risk having it confiscated at the checkpoint — confiscated items are gone permanently, with no refund or return.
Mistake 4: Booking Layovers That Are Too Short
The Problem
When booking connecting flights, first-time flyers often choose the shortest layover option available, assuming a quick turnaround saves time. In reality, a layover that’s too short can lead to a missed connection — especially if the first flight is delayed even slightly.
Real Numbers
Airlines generally set minimum connection times (MCTs) for each airport, but these minimums represent the bare floor, not a comfortable buffer:
- Domestic-to-domestic connections: Typically 30–45 minutes minimum, but 60–90 minutes is safer.
- International-to-domestic (with customs/immigration): Minimum is often 60–90 minutes, but 2+ hours is recommended.
- International-to-international: Can require 90 minutes to 3+ hours depending on the airport, since you may need to clear security and immigration again.
Large hub airports like Chicago O’Hare, Denver, or Frankfurt often require longer walks between gates or even a terminal change via train, adding 15–30 minutes just to get from one gate to another.
How to Avoid It
- Avoid booking the airline’s advertised “minimum connection time” unless you have no checked bags and are very familiar with the airport.
- Choose connections of at least 75–90 minutes for domestic flights, and 2+ hours for international connections, especially on your first trip.
- Check whether your connection requires a terminal change, which can be found in the flight details when booking.
- If connecting through an unfamiliar international airport, research whether you’ll need to re-clear security or collect and recheck luggage.
- Consider a direct flight for your first trip if the price difference is reasonable — it removes an entire category of risk.
Pro Tip
If your layover is under an hour and your first flight gets delayed by even 20–30 minutes, you could miss your connection. Building in extra time doesn’t just reduce stress — it also protects you financially, since missed connections due to a short self-booked layover (versus an airline-caused delay) may not qualify for free rebooking on some fare types.
Mistake 5: Not Verifying Passport and ID Requirements in Advance
The Problem
This is one of the most devastating first-time flyer mistakes because it can result in being denied boarding entirely — even after you’ve made it all the way to the gate. New international travelers often don’t realize that many countries require a passport to be valid for at least six months beyond your travel dates, not just valid through your return date.
Domestic travelers face a different but related issue: as of the federal REAL ID enforcement deadline, standard state-issued IDs that are not REAL ID-compliant are no longer accepted for domestic flights without an alternative form of ID like a passport.
How to Avoid It
- Check your passport’s expiration date at least 6 months before your trip. If it expires within 6 months of your return date, renew it immediately — some countries will deny entry even if you technically have days left on the passport.
- Confirm whether your destination requires a visa, entry permit, or specific vaccination documentation. Requirements vary widely and change periodically, so verify with the destination country’s official government or embassy website.
- Check if your driver’s license is REAL ID-compliant for domestic U.S. travel. Look for a star marking in the corner of the card — if it’s missing, you’ll need a passport or another TSA-acceptable form of ID.
- Make a digital and physical copy of your passport and ID, stored separately from the originals, in case of loss or theft.
- Register international trips with your home country’s traveler assistance program if one is available, so you can be reached in an emergency.
Pro Tip
Passport processing times fluctuate, especially during peak travel seasons. If you don’t yet have a passport and are planning international travel, apply at least 8–12 weeks in advance, or consider expedited processing (for an additional fee) if your trip is sooner.
Mistake 6: Overpacking Carry-On Luggage
The Problem
First-time flyers frequently overestimate how much they can fit in a carry-on bag, or they misjudge the airline’s specific size restrictions, resulting in a bag that must be gate-checked — sometimes for a fee, and always with the risk of delay or damage.
Real Numbers
Standard U.S. domestic carry-on size limits are typically around 22 x 14 x 9 inches (56 x 36 x 23 cm), including handles and wheels. However, this varies:
- Some ultra-low-cost carriers use smaller “personal item only” allowances for their cheapest fares, sometimes as small as 18 x 14 x 8 inches.
- International carriers, especially in Europe and Asia, often have stricter and smaller limits than U.S. domestic norms.
- Overhead bin space fills up quickly on full flights — even a compliant bag may need to be gate-checked if you board late (a common issue for first-time flyers unfamiliar with boarding groups; see Mistake #8).
How to Avoid It
- Measure your bag before you leave home, including any external pockets or wheels that might add to the dimensions.
- Weigh your carry-on — even carry-ons can have weight limits (often 15–22 lbs / 7–10 kg) on international and budget carriers.
- Pack a “personal item” that fits under the seat, separate from your main carry-on, to maximize what you can bring without checking a bag.
- Board as early as your group allows to secure overhead bin space (see Mistake #8 for a full boarding group breakdown).
- Have a backup plan: if you must gate-check your bag, remove essentials (medications, electronics, valuables, chargers) before handing it over.
Pro Tip
Roll clothing instead of folding it to save significant space, and use packing cubes to compress soft items like clothing and towels. This alone can free up 20–30% more usable space in a standard carry-on.
Mistake 7: Not Checking In Early or Selecting Seats
The Problem
Many first-time flyers don’t realize that check-in timing can directly affect their seat assignment, boarding group, and even their odds of being bumped from an oversold flight. Waiting until the last minute to check in — especially on airlines that use open or tiered boarding systems — often results in being assigned a middle seat, a seat far from travel companions, or a late boarding position with no overhead bin space left.
How to Avoid It
- Check in as soon as the airline allows — typically 24 hours before departure for most carriers, though some international airlines open check-in earlier.
- Select your seat at booking if the airline allows it, rather than leaving it to be auto-assigned.
- Understand your airline’s seating model: some assign seats at booking, others use “open seating” where your boarding group and check-in time determine your options.
- If traveling with others, confirm you’re seated together — don’t assume it happens automatically, especially on discount fares.
- Consider paying for seat selection on budget carriers if sitting together or getting an aisle/window seat matters to you; otherwise, seats may be randomly assigned at check-in.
- Enroll in the airline’s frequent flyer program before booking (it’s free) — even as a first-time flyer, this can sometimes improve your boarding priority and seat options.
Pro Tip
If you’re flying a carrier with open seating, checking in at exactly the 24-hour mark (not an hour or two later) can make a meaningful difference in your boarding position and seat availability.
Mistake 8: Misunderstanding Boarding Groups and Procedures
The Problem
Boarding announcements can be confusing for first-time flyers: “Now boarding Group 3” means little if you don’t know how groups are assigned or where to find your group number. Some travelers line up at the gate too early (crowding the boarding area unnecessarily), while others miss their boarding call because they didn’t realize their group had been called.
How Boarding Groups Typically Work
| Group | Who Boards |
| Pre-boarding | Passengers needing extra time/assistance, active military, families with small children (varies by airline) |
| Group 1 / Zone 1 | First class, top-tier elite frequent flyers |
| Group 2–3 | Mid-tier elite members, premium economy, early check-in passengers |
| Group 4–6 (or similar) | General boarding, often by seat location (back of plane first) or check-in time |
| Basic Economy / Final Group | Passengers with the cheapest fare class, often boarding last with limited overhead bin space |
How to Avoid It
- Find your boarding group on your boarding pass — it’s usually printed clearly near your seat number.
- Listen for your specific group number, not just “boarding has started.” Boarding early when you’re not called can result in being turned away at the jet bridge.
- Arrive at your gate at least 30–45 minutes before departure to make sure you don’t miss your group being called if you’re away from the gate area (grabbing food, using the restroom, etc.).
- If flying basic economy, expect to board last — pack accordingly, since overhead bin space is likely to be full by the time you board (see Mistake #6).
- Download your airline’s app to receive real-time gate and boarding notifications, especially useful if the gate changes.
Pro Tip
Overhead bin space fills front-to-back on most flights. If you’re in a late boarding group and traveling with a full-size carry-on, prepare mentally for the possibility of gate-checking it — this is normal and not something to panic about, especially since it’s usually free when done at the gate (versus a paid checked bag).
Mistake 9: Dressing Inappropriately for the Flight
The Problem
Cabin temperatures, long hours in a seated position, and unpredictable airport conditions catch many first-time flyers off guard. Wearing the wrong clothing can mean an uncomfortable flight, difficulty getting through security quickly, or being unprepared for drastic temperature swings between departure and arrival cities.
How to Avoid It
- Dress in breathable layers. Cabin temperatures vary widely and are often kept cooler than expected; a light jacket, cardigan, or sweater is easy to remove or add as needed.
- Wear slip-on shoes or shoes that are easy to remove for security screening (unless you have TSA PreCheck).
- Avoid clothing with excessive metal (large belt buckles, heavy jewelry, metal-studded accessories), which can slow down security screening.
- Choose comfortable, non-restrictive clothing for long flights — compression socks are also worth considering for flights over 4–5 hours to reduce swelling and improve circulation.
- Pack a travel pillow and light blanket or scarf in your personal item for long or overnight flights, since airline-provided blankets aren’t always available, especially on budget carriers or shorter flights.
- Consider your arrival climate, not just your departure climate — pack or wear a layer appropriate for landing somewhere significantly warmer or colder than where you took off.
Pro Tip
Bring a reusable water bottle (empty, to fill after security) and a light snack — cabin air is notoriously dry, and in-flight food/beverage service can be limited, delayed, or come with a cost on many carriers.
Mistake 10: Skipping Travel Insurance or Trip Protection
The Problem
First-time flyers often skip travel insurance, assuming it’s unnecessary for a straightforward trip, or they don’t understand what it actually covers. This becomes a costly mistake if a flight is cancelled, luggage is lost, or a medical emergency arises — especially for international travel, where healthcare costs and logistics can be far more complicated without protection in place.
What Travel Insurance Typically Covers
| Coverage Type | What It Protects Against |
| Trip cancellation/interruption | Reimbursement if you must cancel or cut short your trip for a covered reason (illness, family emergency, etc.) |
| Baggage loss/delay | Reimbursement for lost, delayed, or damaged luggage |
| Emergency medical | Coverage for illness or injury abroad, where your regular health insurance may not apply |
| Emergency evacuation | Coverage for medical transport in serious emergencies |
| Flight delay/missed connection | Reimbursement for meals, lodging, or rebooking costs due to significant delays |
Credit Card Coverage vs. Standalone Policies
Many travelers don’t realize that some credit cards include limited travel protections (like baggage delay or trip cancellation coverage) as a cardholder benefit. However, these benefits typically:
- Only apply if the trip was booked using that specific card
- Have lower coverage limits than standalone policies
- Often exclude medical coverage or emergency evacuation
- May require you to exhaust other coverage first (a “secondary” coverage structure)
How to Avoid the Mistake
- Compare your credit card’s built-in travel benefits (if you have one) against a standalone travel insurance policy before assuming you’re covered.
- For international trips, seriously consider a policy with emergency medical and evacuation coverage, since regular domestic health insurance often doesn’t apply abroad.
- Read the fine print on “cancel for any reason” (CFAR) upgrades if trip flexibility matters to you — standard policies only cover specific, listed reasons for cancellation.
- Buy insurance soon after booking, not right before departure — some benefits (like pre-existing condition waivers) require purchase within a specific window after your initial trip deposit.
- Weigh the cost against the trip value: for a low-cost, fully refundable domestic trip, insurance may be unnecessary; for an expensive, non-refundable international trip, it’s often a worthwhile investment.
Pro Tip
Even if you decide against comprehensive travel insurance, consider at minimum understanding your airline’s own delay/cancellation policies and your rights under regulations like the U.S. Department of Transportation’s passenger protections or the EU’s EU261 regulation, which mandate compensation or assistance under certain delay and cancellation circumstances.
Bonus Tips for First-Time Flyers
Beyond the top 10 mistakes, a few smaller habits can make your first flight significantly smoother:
- Download your airline’s app before you travel for mobile boarding passes, real-time gate updates, and easy rebooking if something goes wrong.
- Take a photo of your checked luggage before handing it off, which helps if you need to file a lost baggage claim.
- Keep essential items in your personal item, not your checked bag — medications, chargers, a change of clothes, and important documents should never be checked.
- Familiarize yourself with your specific airport’s layout in advance using the airport’s official website or app, especially for larger hub airports with multiple terminals.
- Arrive at your gate before the boarding announcement, not after — gates can close as early as 10–15 minutes before departure, and being late can result in losing your seat even if you’re at the airport.
Frequently Asked Questions
How early should a first-time flyer arrive at the airport?
For domestic flights, arrive at least 2 hours before departure. For international flights, arrive at least 3 hours before departure to allow time for check-in, security, and any document verification.
What items are not allowed in carry-on luggage?
Common prohibited or restricted items include liquids over 3.4 oz, sharp objects like knives and certain tools, and large aerosol cans. Always check the TSA’s official prohibited items list or your destination country’s equivalent before packing.
Does my passport need extra validity beyond my travel dates?
Yes, for many international destinations. A common requirement is that your passport remain valid for at least six months beyond your intended departure date from that country. Requirements vary, so verify with the specific destination.
What happens if my carry-on doesn’t fit in the overhead bin?
If overhead bin space runs out, your bag may be gate-checked, usually at no charge, and returned to you at the jet bridge upon arrival (or at baggage claim on some flights). This is common and not something to be alarmed about.
Is travel insurance necessary for a first-time flyer on a short domestic trip?
Not always essential for low-cost, fully refundable domestic trips, but strongly recommended for international travel, non-refundable bookings, or any trip where a cancellation or medical emergency would cause significant financial or logistical hardship.
What’s the difference between a personal item and a carry-on?
A personal item (like a purse, backpack, or small bag) fits under the seat in front of you and is almost always included in the ticket price. A carry-on is larger and goes in the overhead bin — some budget fares charge extra for carry-on privileges or only include a personal item.
How do I know which boarding group I’m in?
Your boarding group is printed on your boarding pass, usually near your seat number or barcode. Listen for your specific group to be called rather than lining up as soon as boarding begins.
Conclusion
Your first flight doesn’t have to be a stressful experience. Nearly every mistake covered in this guide — from arriving too late to overpacking a carry-on to skipping travel insurance — is entirely preventable with a little preparation. By understanding baggage rules, security procedures, boarding groups, and document requirements before you ever step foot in the airport, you’ll walk through security with confidence instead of confusion.
Air travel, at its core, is a system with predictable rules once you know them. Learn those rules once, and every flight after your first will feel dramatically easier.
Was this your first time flying, or are you helping someone else prepare for theirs? Either way, a little preparation goes a long way toward a smooth, stress-free trip.